
티스토리 뷰
XML로 데이터를 확인했으니 이제 이거를 활용할 준비를 해볼까요?

컨트롤러에 데이터를 들고 올 수 있도록 작업을 시작할께요.
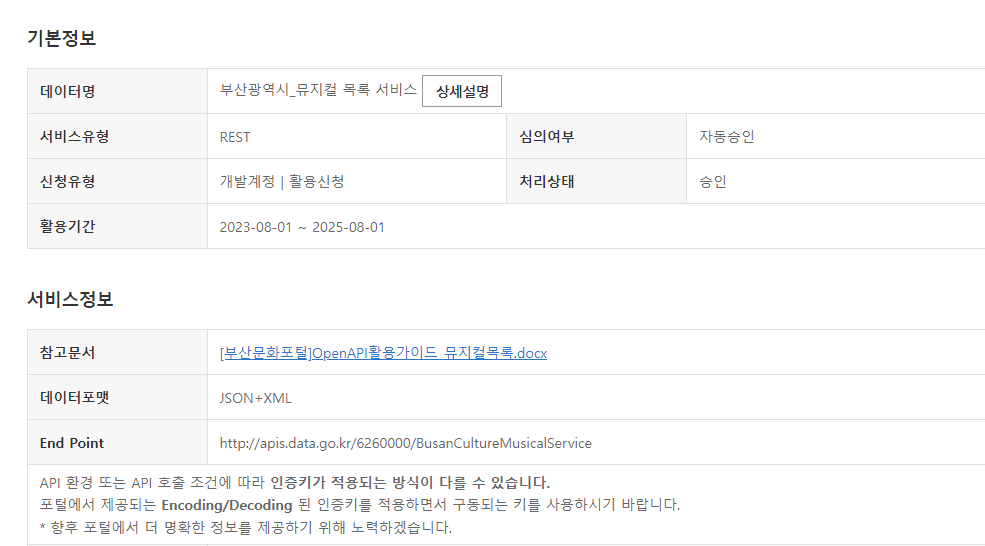
데이터 신청한 곳에 들어가면 상세설명 버튼이 있을꺼에요.
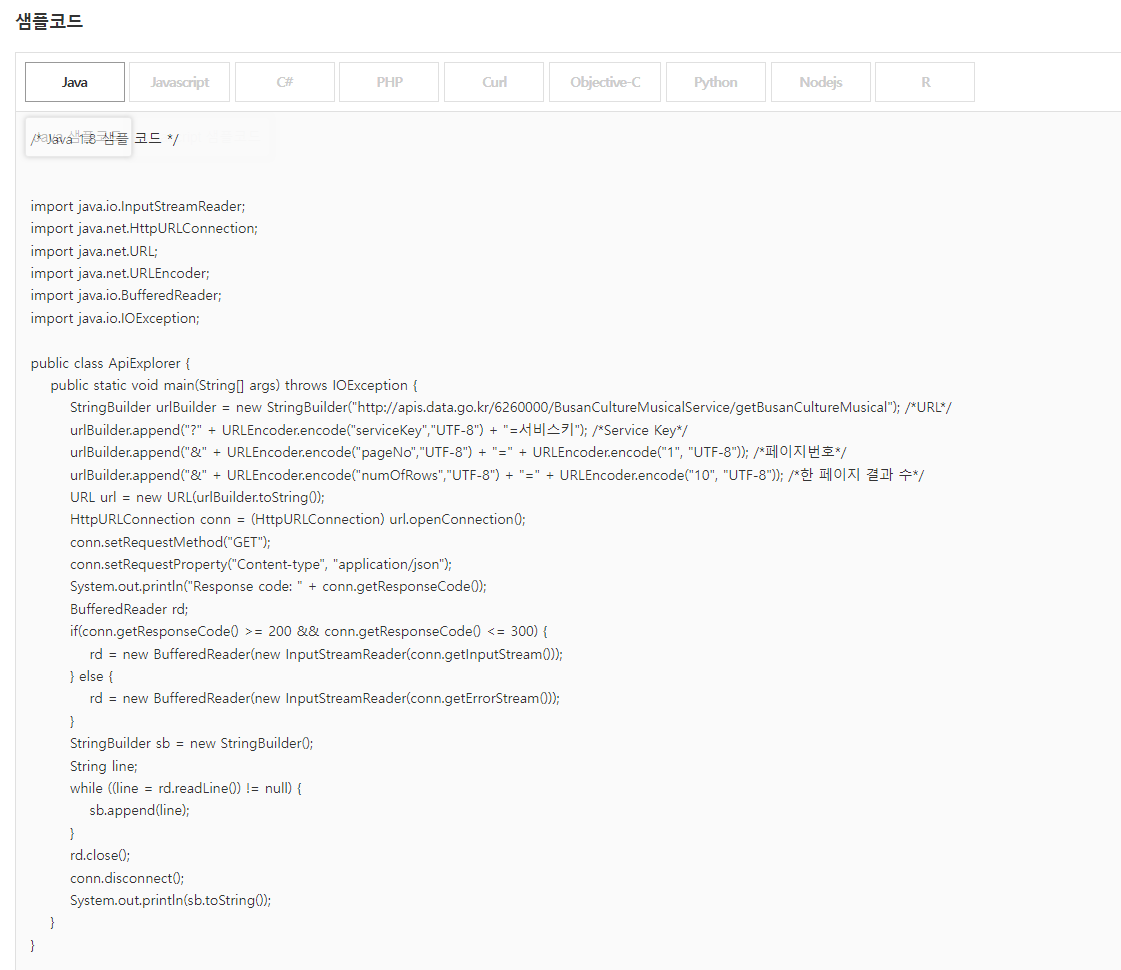
밑으로 내렸을 때 샘플코드가 나오는데
저는 자바니까 자바를 클릭해서 들고올꺼에요.
StringBuilder urlBuilder = new StringBuilder("http://apis.data.go.kr/6260000/BusanCultureMusicalService/getBusanCultureMusical"); /*URL*/
        urlBuilder.append("?" + URLEncoder.encode("serviceKey","UTF-8") + "=서비스키"); /*Service Key*/
        urlBuilder.append("&" + URLEncoder.encode("pageNo","UTF-8") + "=" + URLEncoder.encode("1", "UTF-8")); /*페이지번호*/
        urlBuilder.append("&" + URLEncoder.encode("numOfRows","UTF-8") + "=" + URLEncoder.encode("10", "UTF-8")); /*한 페이지 결과 수*/
        URL url = new URL(urlBuilder.toString());
        HttpURLConnection conn = (HttpURLConnection) url.openConnection();
        conn.setRequestMethod("GET");
        conn.setRequestProperty("Content-type", "application/json");
        System.out.println("Response code: " + conn.getResponseCode());
        BufferedReader rd;
        if(conn.getResponseCode() >= 200 && conn.getResponseCode() <= 300) {
            rd = new BufferedReader(new InputStreamReader(conn.getInputStream()));
        } else {
            rd = new BufferedReader(new InputStreamReader(conn.getErrorStream()));
        }
        StringBuilder sb = new StringBuilder();
        String line;
        while ((line = rd.readLine()) != null) {
            sb.append(line);
        }
        rd.close();
        conn.disconnect();
        System.out.println(sb.toString());
위의 사진에서 이 부분만 복사해서 들고 올꺼에요.
제가 만든 컨트롤러에요.
@RestController
public class MusicalController {


    @GetMapping("/api")
    public String load_save() throws IOException {

        StringBuilder urlBuilder = new StringBuilder("http://apis.data.go.kr/6260000/BusanCultureMusicalService/getBusanCultureMusical"); /*URL*/
        urlBuilder.append("?" + URLEncoder.encode("serviceKey","UTF-8") + "=서비스키"); /*Service Key*/
        urlBuilder.append("&" + URLEncoder.encode("pageNo","UTF-8") + "=" + URLEncoder.encode("1", "UTF-8")); /*페이지번호*/
        urlBuilder.append("&" + URLEncoder.encode("numOfRows","UTF-8") + "=" + URLEncoder.encode("100", "UTF-8")); /*한 페이지 결과 수*/
        URL url = new URL(urlBuilder.toString());
        HttpURLConnection conn = (HttpURLConnection) url.openConnection();
        conn.setRequestMethod("GET");
        conn.setRequestProperty("Content-type", "application/json");
        System.out.println("Response code: " + conn.getResponseCode());
        BufferedReader rd;
        if(conn.getResponseCode() >= 200 && conn.getResponseCode() <= 300) {
            rd = new BufferedReader(new InputStreamReader(conn.getInputStream()));
        } else {
            rd = new BufferedReader(new InputStreamReader(conn.getErrorStream()));
        }
        StringBuilder sb = new StringBuilder();
        String line;
        while ((line = rd.readLine()) != null) {
            sb.append(line);
        }
        rd.close();
        conn.disconnect();
        System.out.println(sb.toString());


        return sb.toString();
    }
}
실행을 시키면 이런 결과가 나와요.
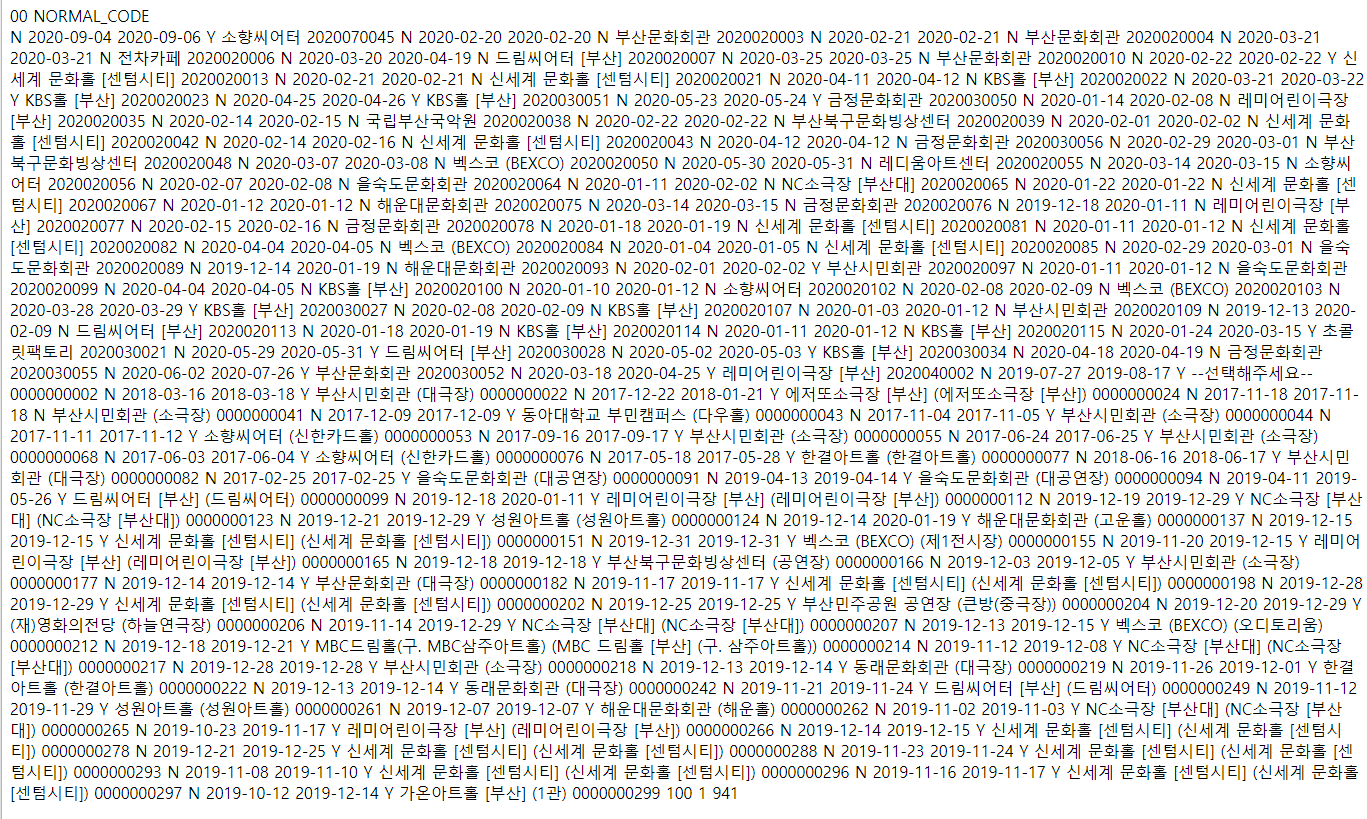
어우.. 너무 어지럽네요.

F12를 눌러서 관리자 모드에 들어가서 깔끔하게 봅시다.
(Network -> Response)

XML에서 JSON으로 바꾸기.
현재 데이터 상태는 XML상태에요.
저는 JSON 형태로 바꿔줄께요.
코드를 추가해주세요.
urlBuilder.append("&" + URLEncoder.encode("resultType","UTF-8") + "=" + URLEncoder.encode("json", "UTF-8")); /*JSON방식으로 호출 시 파라미터 resultType=json 입력*/
위에 코드에서 추가하면 이렇게 될꺼에요.
StringBuilder urlBuilder = new StringBuilder("http://apis.data.go.kr/6260000/BusanCultureMusicalService/getBusanCultureMusical"); /*URL*/
urlBuilder.append("?" + URLEncoder.encode("serviceKey","UTF-8") + "=BrjHJ90yRTyYUg5oXeTm2jkYZqSjX1PwSP7Deo4z9S1eZflecDH0maN6daAzOYp2Yrar15uGqecubtJ1%2Fh%2Fl7w%3D%3D"); /*Service Key*/
urlBuilder.append("&" + URLEncoder.encode("pageNo","UTF-8") + "=" + URLEncoder.encode("1", "UTF-8")); /*페이지번호*/
urlBuilder.append("&" + URLEncoder.encode("numOfRows","UTF-8") + "=" + URLEncoder.encode("10", "UTF-8")); /*한 페이지 결과 수*/
urlBuilder.append("&" + URLEncoder.encode("resultType","UTF-8") + "=" + URLEncoder.encode("json", "UTF-8")); /*JSON방식으로 호출 시 파라미터 resultType=json 입력*/
JSON을 파싱하는 방법은 3가지가 있는거 같아요.
gson, jackson, jsonsimple
저는 jsonsimple 방법을 사용했어요.
Gradle이나 Maven에 추가해줍니다.
https://mvnrepository.com/artifact/com.googlecode.json-simple/json-simple/1.1.1
잡담
저는 이상하게 적용이 안되서
스프링 버전, 자바 버전도 바꿔보고
서버도 껐다 키고, 강제로 리플레쉬도 하고
외부 라이브러리도 따로 넣어보기도 하고 했는데
적용이 잘 안됬어요. ㅎ
지금은 왠지 모르게 적용이 됬는데 아직도 정확한 이유는 모르겠네요.
하루종일 했는데 시간만 날려버렸어 ㅠㅠ
파싱하는 전체 코드에요.
JSONParser parser = new JSONParser();
JSONObject jsonObject = (JSONObject) parser.parse(sb.toString());

// "getBusanCultureMusical" 객체에서 "item" 키에 해당하는 값 가져오기
JSONObject getBusanCultureMusical = (JSONObject) jsonObject.get("getBusanCultureMusical");
JSONArray items = (JSONArray) getBusanCultureMusical.get("item");

// 아이템 배열을 순회하며 각 아이템을 처리하고 저장
for (Object itemObject : items) {
    JSONObject itemJson = (JSONObject) itemObject;

    // 각 아이템의 필드 가져오기
    String res_no = (String) itemJson.get("res_no");
    String title = (String) itemJson.get("title");
    String op_st_dt = (String) itemJson.get("op_st_dt");
    String op_ed_dt = (String) itemJson.get("op_ed_dt");
    String op_at = (String) itemJson.get("op_at");
    String place_nm = (String) itemJson.get("place_nm");
    String pay_at = (String) itemJson.get("pay_at");

    musicalDTO.setRes_no(res_no);
    musicalDTO.setTitle(title);
    musicalDTO.setOp_st_dt(op_st_dt);
    musicalDTO.setOp_ed_dt(op_ed_dt);
    musicalDTO.setOp_at(op_at);
    musicalDTO.setPlace_nm(place_nm);
    musicalDTO.setPay_at(pay_at);

    System.out.println(musicalDTO);


}
데이터를 잘라서 배열로 만들기
JSONObject getBusanCultureMusical = (JSONObject) jsonObject.get("getBusanCultureMusical");
JSONArray items = (JSONArray) getBusanCultureMusical.get("item");
item을 들고와서
JSON배열 items에 넣어줄꺼에요.
이제 저는 10가지의 뮤지컬 정보가 JSONArray 안에 들어가있어요.
이거를 배열로 DTO에 옮겨줍니다.
// 아이템 배열을 순회하며 각 아이템을 처리하고 저장
for (Object itemObject : items) {
    JSONObject itemJson = (JSONObject) itemObject;

    // 각 아이템의 필드 가져오기
    String res_no = (String) itemJson.get("res_no");
    String title = (String) itemJson.get("title");
    String op_st_dt = (String) itemJson.get("op_st_dt");
    String op_ed_dt = (String) itemJson.get("op_ed_dt");
    String op_at = (String) itemJson.get("op_at");
    String place_nm = (String) itemJson.get("place_nm");
    String pay_at = (String) itemJson.get("pay_at");

    musicalDTO.setRes_no(res_no);
    musicalDTO.setTitle(title);
    musicalDTO.setOp_st_dt(op_st_dt);
    musicalDTO.setOp_ed_dt(op_ed_dt);
    musicalDTO.setOp_at(op_at);
    musicalDTO.setPlace_nm(place_nm);
    musicalDTO.setPay_at(pay_at);

    System.out.println(musicalDTO);


}
전체코드
@RestController
public class MusicalController {


    @GetMapping("/api")
    public String load_save() throws IOException, ParseException {

        MusicalDTO musicalDTO = new MusicalDTO();

        StringBuilder urlBuilder = new StringBuilder("http://apis.data.go.kr/6260000/BusanCultureMusicalService/getBusanCultureMusical"); /*URL*/
        urlBuilder.append("?" + URLEncoder.encode("serviceKey","UTF-8") + "=BrjHJ90yRTyYUg5oXeTm2jkYZqSjX1PwSP7Deo4z9S1eZflecDH0maN6daAzOYp2Yrar15uGqecubtJ1%2Fh%2Fl7w%3D%3D"); /*Service Key*/
        urlBuilder.append("&" + URLEncoder.encode("pageNo","UTF-8") + "=" + URLEncoder.encode("1", "UTF-8")); /*페이지번호*/
        urlBuilder.append("&" + URLEncoder.encode("numOfRows","UTF-8") + "=" + URLEncoder.encode("10", "UTF-8")); /*한 페이지 결과 수*/
        urlBuilder.append("&" + URLEncoder.encode("resultType","UTF-8") + "=" + URLEncoder.encode("json", "UTF-8")); /*JSON방식으로 호출 시 파라미터 resultType=json 입력*/
        URL url = new URL(urlBuilder.toString());
        HttpURLConnection conn = (HttpURLConnection) url.openConnection();
        conn.setRequestMethod("GET");
        conn.setRequestProperty("Content-type", "application/json");
        System.out.println("Response code: " + conn.getResponseCode());
        BufferedReader rd;
        if(conn.getResponseCode() >= 200 && conn.getResponseCode() <= 300) {
            rd = new BufferedReader(new InputStreamReader(conn.getInputStream()));
        } else {
            rd = new BufferedReader(new InputStreamReader(conn.getErrorStream()));
        }
        StringBuilder sb = new StringBuilder();
        String line;
        while ((line = rd.readLine()) != null) {
            sb.append(line);
        }
        rd.close();
        conn.disconnect();
        System.out.println(sb.toString());

        JSONParser parser = new JSONParser();
        JSONObject jsonObject = (JSONObject) parser.parse(sb.toString());

        // "getBusanCultureMusical" 객체에서 "item" 키에 해당하는 값 가져오기
        JSONObject getBusanCultureMusical = (JSONObject) jsonObject.get("getBusanCultureMusical");
        JSONArray items = (JSONArray) getBusanCultureMusical.get("item");

        // 아이템 배열을 순회하며 각 아이템을 처리하고 저장
        for (Object itemObject : items) {
            JSONObject itemJson = (JSONObject) itemObject;

            // 각 아이템의 필드 가져오기
            String res_no = (String) itemJson.get("res_no");
            String title = (String) itemJson.get("title");
            String op_st_dt = (String) itemJson.get("op_st_dt");
            String op_ed_dt = (String) itemJson.get("op_ed_dt");
            String op_at = (String) itemJson.get("op_at");
            String place_nm = (String) itemJson.get("place_nm");
            String pay_at = (String) itemJson.get("pay_at");

            musicalDTO.setRes_no(res_no);
            musicalDTO.setTitle(title);
            musicalDTO.setOp_st_dt(op_st_dt);
            musicalDTO.setOp_ed_dt(op_ed_dt);
            musicalDTO.setOp_at(op_at);
            musicalDTO.setPlace_nm(place_nm);
            musicalDTO.setPay_at(pay_at);

            System.out.println(musicalDTO);


        }

        return sb.toString();
    }


}
결과

이제 남은건 DB에 넣어주는게 남았네요.
3편으로 돌아올께요.
관련 게시글
공공데이터포탈 Open API 사용법 1. (데이터 불러오기)
일단 공공데이터포탈에 접속을 합니다. 원하는 제목의 오픈 API에 들어가서 활용신청을 해주세요 저는 부산광역시_뮤지컬 목록 서비스을 했어요. 활용신청을 하는건 간단해요 원하는 API에 들어
paine.tistory.com
공공데이터포탈 Open API 사용법 3. (Mysql 데이터 넣기) JAVA — 파이네 개발일지 (tistory.com)
공공데이터포탈 Open API 사용법 3. (Mysql 데이터 넣기) JAVA
이번에는 파싱한 데이터를 DB에 넣는 작업을 진행했어요. 컨트롤러 package com.codingrecipe.board.controller; import com.codingrecipe.board.dto.MusicalDTO; import com.codingrecipe.board.service.MusicalService; import lombok.RequiredAr
paine.tistory.com
'코드공부 > 공공데이터포탈 사용하기' 카테고리의 다른 글
| 공공데이터포탈 Open API 사용법 3. (Mysql 데이터 넣기) JAVA (1) | 2024.03.19 |
|---|---|
| 공공데이터포탈 Open API 사용법 1. (데이터 불러오기) (1) | 2024.03.17 |
- Total
- Today
- Yesterday
- docker
- 스택
- Queue
- JPA
- Git
- wsl
- JWT
- CSS
- 국비
- git 베포
- static
- 국비지원
- 인텔리제이
- deque
- 공공데이터포탈
- 덱
- 백준
- 프로그래머스
- 정보처리기사
- 오류
- 해시
- 롯데
- java
- 국비교육
- form
- (롯데)기업맞춤형 프로젝트
- 자료구조
- 그린대학교
- 김영한
- MySQL
| 일 | 월 | 화 | 수 | 목 | 금 | 토 |
|---|---|---|---|---|---|---|
| 1 | 2 | 3 | 4 | 5 | 6 | 7 |
| 8 | 9 | 10 | 11 | 12 | 13 | 14 |
| 15 | 16 | 17 | 18 | 19 | 20 | 21 |
| 22 | 23 | 24 | 25 | 26 | 27 | 28 |